1. Sugar Cookies
2. Hot Chocolate Chip Cookies
3. Eggnog Bundt Cake
4. Licorice Caramels
5. Oreo Truffles
Gingerbread Waffles
Gingersnaps
Lion House Rolls
Chocolate Dipped Orange Slices
English Toffee
Marshmellow Fudge
Sugar Cookie Truffles


 It is December! Time for oranges, cranberries, gingerbread, cinnamon, mmm... I LOVE it!!! Time for baking and listening to Amy Grant sing about the season. We put our tree up on Black Friday, are down shopping, will have Christmas cards out this week, and am baking and delivering my holiday cookie plates this Saturday. I think it will be about 30 this year. Not to bad. Going to make all my favorites toffee, fudge, sugar cookies, peanut butter kiss cookies, and one of Paul's favorites homemade oreo sandwiches rolled in crushed candy canes. I have been experimenting with cranberry muffin recipes. One was cranberry upside down muffins. One was a cranberry orange combination, and one was a cran-apple combo. These were my favorite and they were probably the healthier version. Next, I am going to try fresh cranberries in my waffles. Yummy! I will let you know how that turns out. Speaking of waffles, last year we tried these gingerbread waffles that were yummy...don't forget to try them this season.
 Every now and then, a holiday screams for a little something new to tease your tate buds. Something straying from the norm pie choices and family favorites. For our Thanksgiving day, these homemade salted pumpkin caramels were just the ticket. Same ol' fall flavors remixed into creamy, bite-sized melt in your mouth caramels.
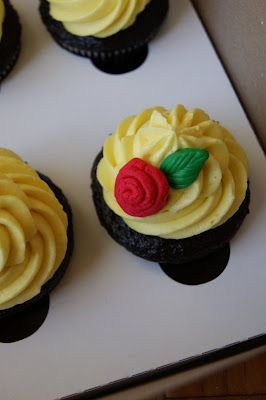
 I have, as always, been baking lately. We had company in town...twice. I introduced my parents to the wonders of pistachio cake. And got my brother in law Jared addicted to these sugar cookies. And my sister in law taught me her tips and recipes for homemade chocolates...YUM! I will share with you soon. In the meantime, here is one of our favorites!
 One of my fav. customers requested spider cookies. Her daughter plays lacrosse for a college whose mascot is the spiders. We found these cookies from the decorated cookie and they were perfect. One problem...she and I seeaarcheed the internet. (seeaarcheed means we devoured the internet for many hours) Yet we could not find this cookie cutter. In fact, we couldn't find a cute spider cookie cutter no matter how hard we tried. They all had fangs, or were a strange angle of a spider. I was prepare to free hand cut out each cookie when I had a thought...there has to be some way to make a simple cookie cutter. Oh...there is. Check this out! Paul had me this great shape in under 30 minutes for the grand total of $0. (we had all the supplies needed in our garage!) Paul actually had fun doing this project and told me never to buy another cookie cutter again. Check out the tutorial and give it a swirl!


 Ad who doesn't like a cupcake... how 'bout these chocolate bat-topped cupcakes?

Or Monster cupcakes?


 OK...this is my dad's all time favorite treat. You know how they say you marry someone like your father? Well....Paul actually differs from my dad a lot...but these get his vote. Whenever I throw out the question, "What treat do you want me to bake?" he answers ...."Ohhh...chocolate rebel bars. Now...I must point out that I saw these on a blog a few days ago and they were called Chocolate Revel Bars. Is it possible that my family has been saying this wrong for like 20 years?!!! Or, did this other chick get it wrong?! Oh Well...I am a rebel and will therefore keep calling these Chocolate Rebel Bars. So... boo-ya, there ya have it.
 One of my girlfriends threw a super cute surprise Luau for her husband...and even managed to keep it a secret. She ordered this cake from me. We found the cake idea on family fun website I believe...but there are photos of this cake EVERYWHERE on line. I added my own twist. I added a gumpaste/fondant shark fin. I also added a little more dimension to the cake by adding the hill on the beach with an upside down cupcake. The sand is finely crushed graham cracker crumbs. I also used candy rocks...my original twist on the cake. Making the white caps on the waves took some trial and error. What worked for me was to smooth on the blue blue frosting with swirly motions. Then I pipe white swirly lines with frosting. Then I took a butter knife and smoothed the harsh white line into the blue frosting blending the two together. I bought the surf board, hula figurines, palm trees, and the beach chair at my local cake supply store. They were like .25 a piece. EASY cute cake that anybody could do!!!
 I am not a creative person. I cannot sit and draw something great. But...I can look at a simple drawing and copy it well. I cannot throw together a super cute outfit that awes a passerby. But...I can copy items from a picture and come across put together. I cannot design a cake from scratch but can copy a cute picture I found on pinterest relatively easily. If a customer asks for a teacher gift...I am like....duhhhh....emptiness....But...I can turn to Bakerella and copy her brilliantness (spell check tells me this is not a word...I don't care) quite well. Thank goodness for the talents of others. Right? I feel like I would be a blob of nothingness without the creativity of others to copy. Any one else out there like me??!!
  I know...it's beautiful isn't it? Nuts, moist cake, chocolate....oh my! Seriously this is one of those recipes that I will make for the rest of my life. I got the recipe from a girlfriend of mine. She got it from her sister-in-law and it is their family favorite for get-togethers. I couldn't wait to try it. Paul says that he wants this to be his new birthday cake every year....can't wait till January...
 Effortless. Fast. Cute. These baseball cupcakes are a hit for any team of hungry cupcake lovers! I feel stupid even posting instructions! Simply spread on white buttercream smoothly with a small spatula. With red royal icing, in a bag with a number 2 tip, pipe on laces. Wa-La! You have a baseball. Batters Up!!


 Ben's first day of kindergarten!
 Auntie Lo Lo and Lukey Pookie
 Ben. Skinny and white!
 Me wake surfing behind my in-laws boat.
 Wyatt and cousin Logan....to the rescue!!
 Fast, easy, no turning on the oven...bu-yah! These bad boys are creamy and light (well, according to me...). Believe it or not...this is the first time I have made peanut butter bars. I am sure they are a staple for most, where have I been. But, if you have been lost in the world like me, here is a ggrreaat (said like Tony the Tiger) recipe for ya! I made these for my company the other day along with a raspberry chiffon pie that took me hours, 3 steps, homemade crust, boiling raspberries, etc. The peanut butter bars were gone in an instant and the pie was a disappointment. So, here you have it....drumroll please....the winner of the backyard BBQ desserts ....


 Oh Goodness! Where has the summer gone!? I had such plans with my kiddos and better start packing it in over the next month!! I am having some friends over Sunday for dinner and am excited for the desserts I am making. Hope they are good enough to post and share with you. Here is a hint....one is chocolate and peanut butter and the other is fruity and light. They should balance each other perfectly! Also this weekend I am making some women's shoes sugar cookies...should be cute. Til then, here is the cupcake recipe to go with the key lime cupcakes I posted last week. The frosting recipe will come tomorrow along with a teaser list of recipes to come.


